Navigate the Tool Registry
Find built-in tools and assess their permissions, health, schemas, and recent usage before adding them to a workflow.
Use the Tool Registry to find a built-in tool and decide whether it is appropriate for a skill or agent graph. You can compare categories, read/write behavior, health, call counts, schemas, and recent invocations without running the tool.
Before you begin
You must be signed in to Agent Studio. Open Tool Registry from the dashboard and know what the workflow must do—for example, calculate a value, search documents, look up a record, or create a task.
WRITE tool can change stored data. The built-in Task Creator requires human approval; confirm the permission and approval badges before you grant a skill access to it.Find and assess a tool
Open Tool Registry at /dashboard/tools. Review the summary and the PERMITTED TOOLS MATRIX.
The summary shows the number of categories, registered tools, and calls. Tool cards are grouped under COMPUTE, SEARCH, DATA, and TASK. Each card identifies its permission, current health, and call count.
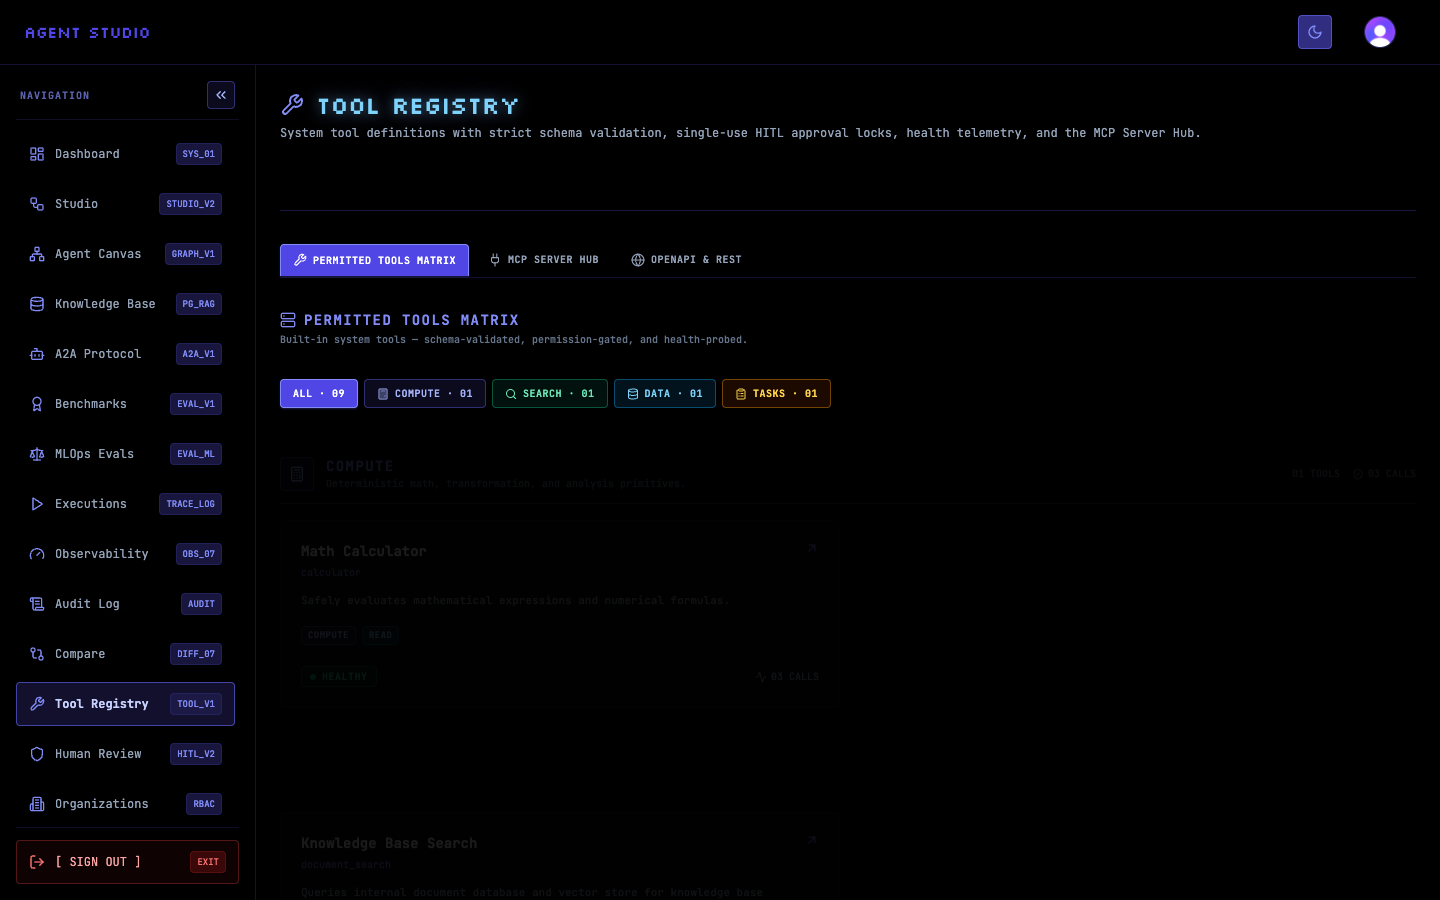
Select the category that matches the job. Use COMPUTE for calculations or deterministic decisions, SEARCH for document retrieval, DATA for record or structured-data work, and TASK for workflow outputs or actions.
The registry retains the selected category when you open a tool and use BACK TO TOOL REGISTRY. This keeps the comparison focused on tools with a similar purpose.
Read the permission badge on the candidate tool. READ means the tool does not represent a write action in the registry. WRITE identifies a tool that changes data. If HITL REQUIRED appears, the tool requires a human-in-the-loop approval before its action proceeds.
Treat the permission badge as a decision boundary, not a health signal. A healthy WRITE tool can still create persistent data, while a READ tool can be unavailable because one of its dependencies is down.
Check the health label and latency. HEALTHY indicates that the latest probe succeeded; DEGRADED indicates a partial problem; UNAVAILABLE indicates that the probe failed. NO PROBE means there is no current probe result, not that the tool is healthy.
Use the call count to understand recent use, but do not treat popularity as proof that a tool fits your input or permission requirements.
Open the tool card. On the detail page, confirm the internal tool name, category, permission, approval requirement, health, and total calls. Then inspect INPUT SCHEMA (JSON) and OUTPUT SCHEMA (JSON) to verify required fields, allowed values, and the result shape.
For example, open Calculator to confirm that it is a READ tool and inspect its structured schemas. The RECENT INVOCATIONS (LAST 10) section shows recent calls that are available to the signed-in user.
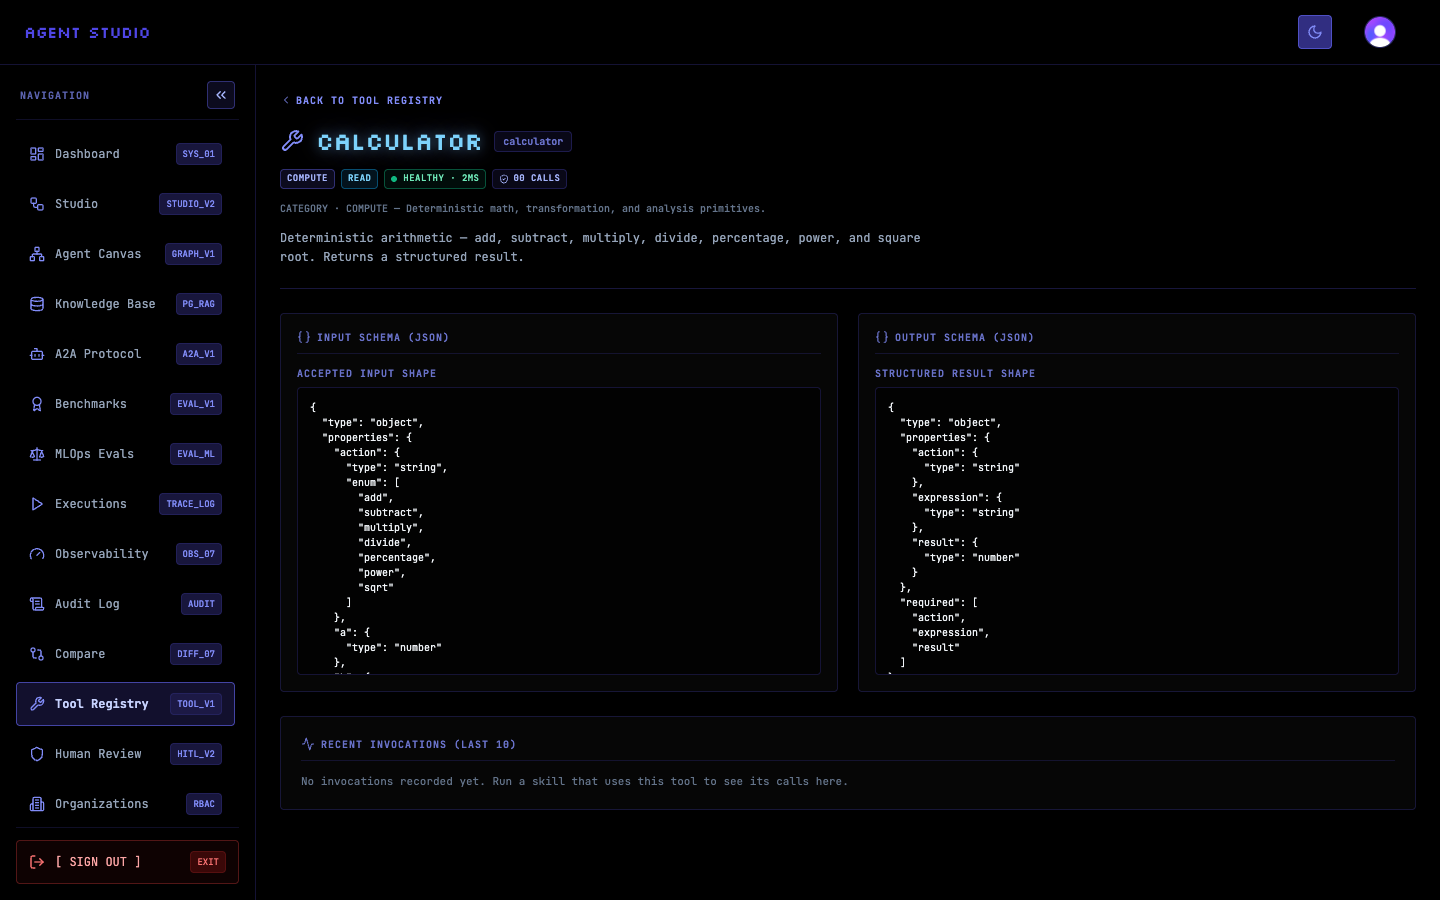
Compare the schema and permission against the workflow requirement. Prefer a READ tool when the workflow only needs information or computation. Choose a WRITE tool only when changing stored data is the intended outcome and the workflow includes the required approval path.
Record the exact internal name, such as calculator or document_search, because workflow configuration uses stable tool identifiers rather than the display label alone.
Verify the choice
Confirm that the detail page shows the expected category and permission, that the health state is acceptable for your environment, and that every required input can be supplied by the workflow. Check that downstream nodes can consume the documented output shape.
Troubleshooting
Next steps
Use Built-in tools reference to compare every input, output, validation rule, and failure. Then configure access through Configure skill permissions.